FAQ 🇬🇧
UpReach App
The UpReach App starts automatically after turning on the Photo System. Besides this, it can always be opened manually by tapping on the “UpReach App” icon in the Desktop. Starting might take up to 1 minute. If the App does not start, please Restart the Photo System and wait until the App starts automatically. |  |
| 1 | While being on the Start Screen | Capture Modes of your user flow, tap on the upper right corner of the screen to open the header menu. | 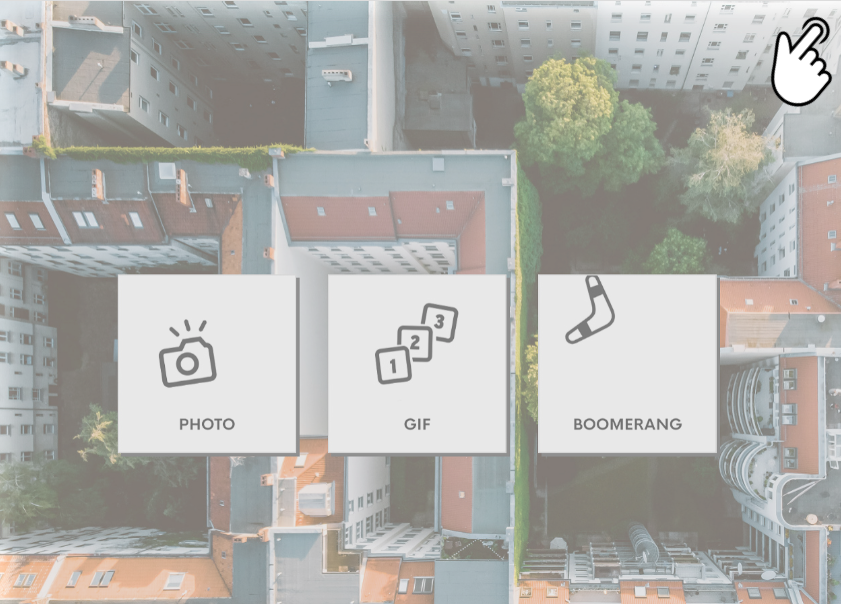 |
| 2 | Tap on the header menu item “Exit App” to open the exit password dialog. | 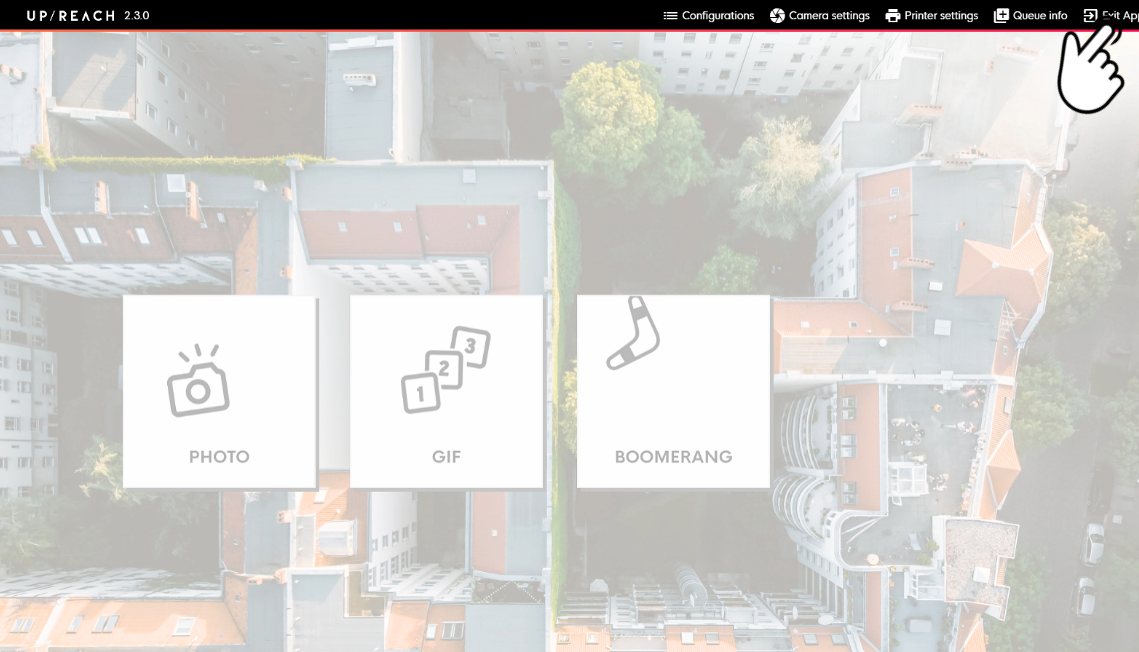  |
| 3 | Enter your Exit/settings password and tap “Exit App” to exit the UpReach App and get to the device’s desktop. | 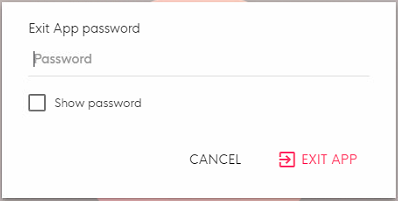 |
On the Windows Desktop either:
or:
|   |
| 1 | 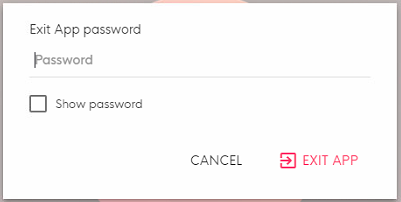 | |
| 2 | Open the on-screen touchscreen keyboard if needed by tapping on the “Keyboard” icon on the desktop or the taskbar. |   |
| 3 | Tap the “Networks” icon on the Desktop or in the bottom right corner on the taskbar. |   |
| 4 | Choose your desired Wi-Fi network & tap “Connect” (“Verbinden”). Make sure “Connect automatically” (“Automatisch verbinden”) is enabled if you want the computer to connect to the network automatically next time. | 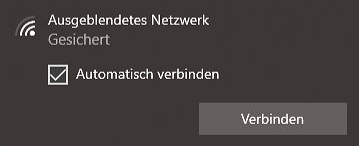 |
| 5 | If the network is protected: enter your password & tap “Continue” (“Weiter”). If the network is a public hotspot, you might be required to log in via the hotspot login page that usually opens automatically. If it doesn’t open automatically please contact your local network administrator to access the page via the browser. | 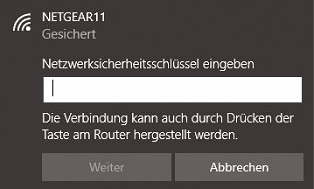 |
If your Wi-Fi is a hidden network you have to open Windows’s Wi-Fi settings, select “Manage known networks” (“Bekannte Netzwerke verwalten”) and choose “Add new network” (“Neues Netzwerk hinzufügen”). There you can enter the network details. Please contact your local network administrator for further information.
If there is no internet connection via our mobile router or your Wi-Fi network, all data (photos, emails, SMS, form submissions, analytics etc.) are temporarily stored in an upload queue. As soon as the connection is restored, all data will be uploaded & sent out.
You can check the current status of the upload queue:
| 1 | Open the In-App Settings menu bar by tapping the upper right corner in the App. |
|
| 2 | Select “Queue” and enter your Exit/settings password. |  |
| 3 | Now you can see if there is any data that has not been uploaded/sent yet. If there is unsent data, make sure that the Photo System has internet connection (e.g. Connect to Wi-Fi). If the queue is still full although there is good internet connection, try to Restart the Photo System. If this doesn’t help either please consult your local network administrator to investigate the internet connection - perhaps certain outgoing connections are being blocked. If the queue does not empty or empty only very slowly, your itnernet connection is not good enough. If the queue still is stuck please contact the 📞 UpReach Customer Support. | 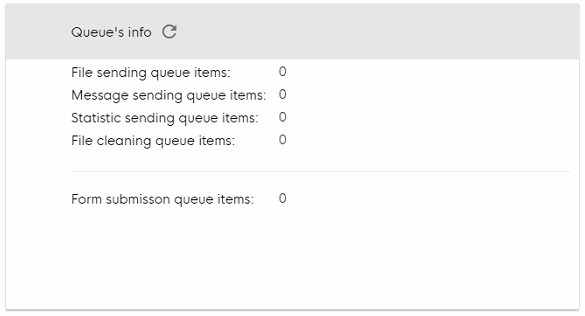 |
| 1 | You can switch between your downloaded Configs at any time. While being on the Start Screen | Capture Modes of your user flow, tap on the upper right corner of the screen to open the header menu and select “Configurations”. |  |
| 2 | Enter your Exit/settings password and confirm. | 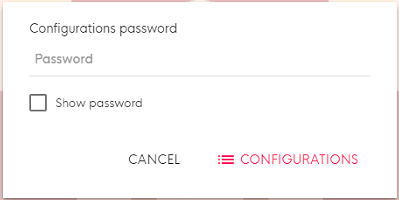 |
| 3 | This is the Configurations overview. Here you will find the downloaded Deployment and all of its Configurations. To select a configuration, simple choose it from the table. After a short loading time your Config is ready. The checkbox on the left marks your selected Configuration. |  |
| 4 | If your Configuration is selected, downloaded & ready to be used (green checkmark) you can tap on the big red start button at the bottom of the screen (the currently selected Config is displayed below the button). The Start Screen | Capture Modes will show up and you can start taking photos/videos. |  |
Yes, you can sync all photos of a Deployment live into your Dropbox, based on predefinable conditions. For more info please refer to Sync a Deployment's photos/videos live to a Dropbox folder.
App Configuration & User Flow
There are two ways to design your own Start Screen with custom capture mode icons:
Include the icons in you Start Screen background image/animation and hide the Capture Mode icons
Upload separate icons for each capture mode
Visit 2. Start Screen & general settings for more information.
UpReach Classic | General
Fully assembled the System has the following specifications:
Photo Booth: 52cm x 38cm x1 60cm; 35kg
Print Terminal: 34cm x 49cm x 84cm; 45kg
Space required: 2m x 2,5m (min. 1,5m x 1,5m) floor area with a 1,3m x 1,9m background surface (e.g. wall)
Depending on the service you ordered the shipping you receive might vary. The standard solution however comes as follows:
Photo Booth: 60cm x 60cm x 120cm, 35 kg
Print Terminal part 1: 70cm x 42cm x 58cm, 20 kg
Print Terminal part 2: 55cm x 40cm x 35cm, 25 kg
As power supply a standard 220V connection is needed. The Y-shaped power cable that comes with the system is 1,8m long and provides power for both the Photo Booth and the Print Terminal. If no wall-plug is within reach make sure to provide an extension cable.
A Wi-Fi or LAN/Ethernet cable connection is strongly recommended. If none is available the internal LTE-router is used to provide a mobile connection. If under certain circumstances a LTE connection might fail all content is stored on the device and shared as soon as a connection is available again (see Upload queue (automatic offline mode)).
The system should ideally be used indoors, on level ground and is not to be exposed to rain, high humidity, direct sunlight or extreme cold. The approved temperature range is between 15°C and 30°C.
The Photo System can be used outdoors if the following conditions are fulfilled:
It must not be exposed to direct sunlight, moisture, heat or cold. The outside temperature must be between 10°C and 30°C.
It must not be exposed to the weather (e.g. rain, snow, hail etc.).
It must be set up on solid, even & level ground.
UpReach Classic | In action
The Photo System is controlled via a touchscreen display. Tapping on the start button starts a short countdown (usually 3 seconds) after which the camera starts capturing a photo or video.
It is recommended not to use the system under extreme lighting conditions such as direct sunlight, backlight or single-source lighting (e.g. stage light) to ensure a satisfying picture quality.
You should avoid using reflective or transparent backgrounds (e.g. mirrors and windows) or surfaces of dark color.
The system comes with a internal lighting solution that provides proper lighting for most circumstances. If you find the brightness on the pictures not to your satisfaction, you can adjust the Camera settings via the software interface.
Additional lighting can always improve the image quality, especially for video capturing and in dark locations. Please contact your UpReach project manager for further information.
Most UpReach devices - including the UpReach Classic and UpReach Pro - start automatically after connecting them to power. Only some need to be started manually - please refer to the manuals enclosed with the device for further information.
| 1 | Connect the devices to power using the enclosed cables. |
| 2 | Wait for ~60 seconds until the UpReach App has started and your Start Screen | Capture Modes is being displayed. |
| 3 | Now the device is ready to be used. |
| 1 |
| |
| 2 | Tap on the Windows start menu icon in the bottom left corner to open the start menu. If the Windows taskbar and the icon are not visible, tap on the “Networks” icon the the Desktop first to make the taskbar show up. |   |
| 3 | Tap on the on/off icon (power icon). |  |
| 4 | Choose shut down (Herunterfahren) or restart (Neu starten). | 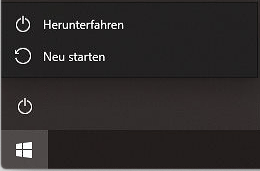 |
Please refer to the manual enclosed with your device for more information or visit Reload/insert printer consumables.
In the event of damage the repair costs will be charged based on our repair price list. Please contact your UpReach project manager for further information.
Related articles
-
Page:
-
Page:
-
Page:
-
Page:
-
Page: