Reload/insert printer consumables
Contents
Instructions
| 1 | Remove the branding off the upper part of the print terminal. | 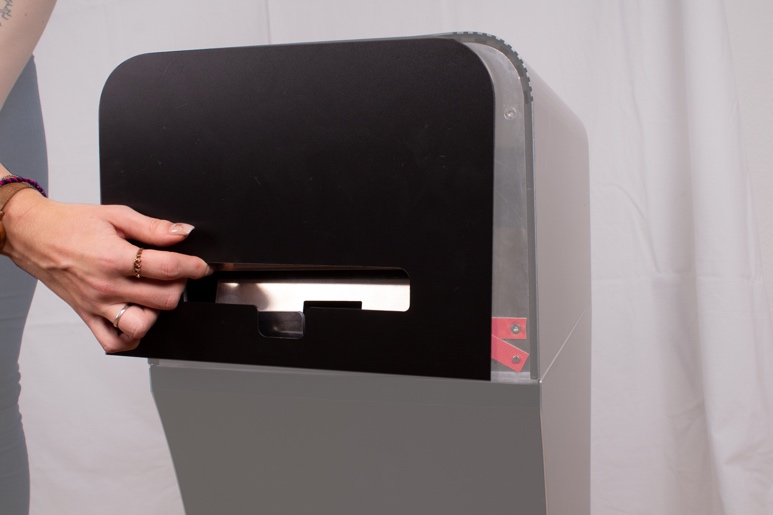 |
| 2 | Unplug all four pins on the front and back of the terminal. | 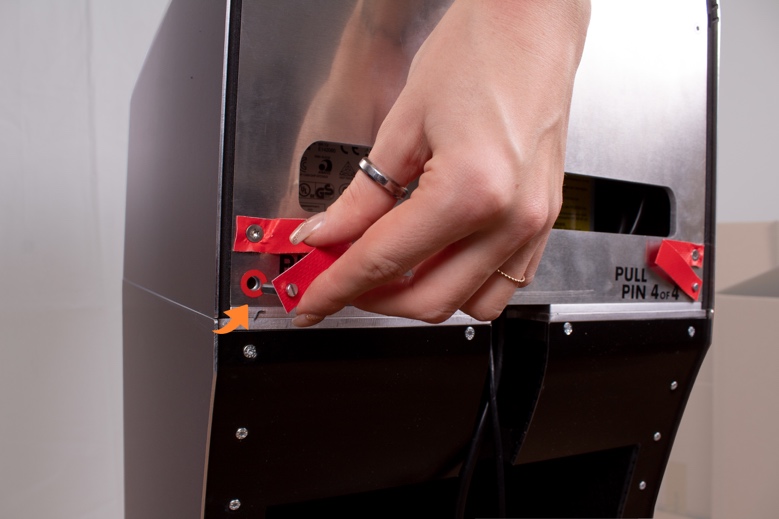 |
| 3 | Remove the upper Housing of the print terminal. | 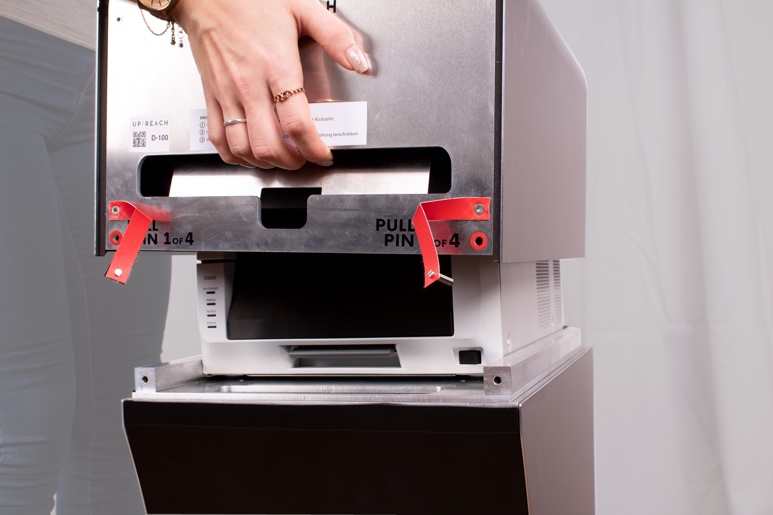 |
| 4 | Open the printer by pulling the lever on the buttom of the front and moving the inner drawer outwards. | 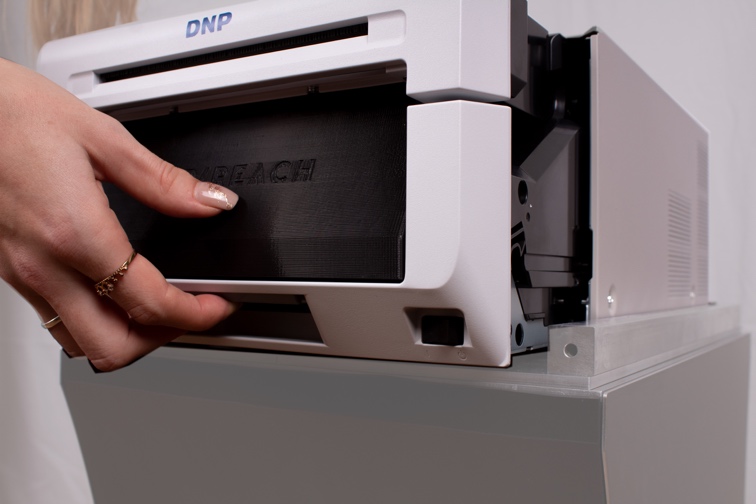 |
| 5 | Press the blue lever on top of the inner drawer and open the printer. | 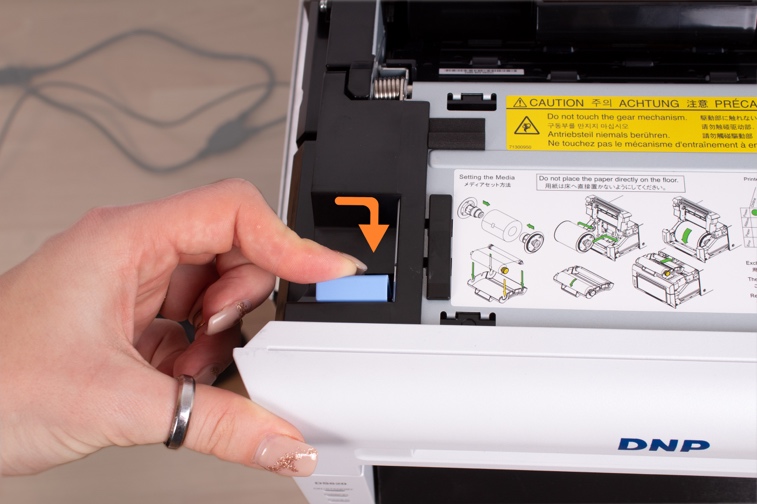 |
| 6 | Remove the paper guide. | 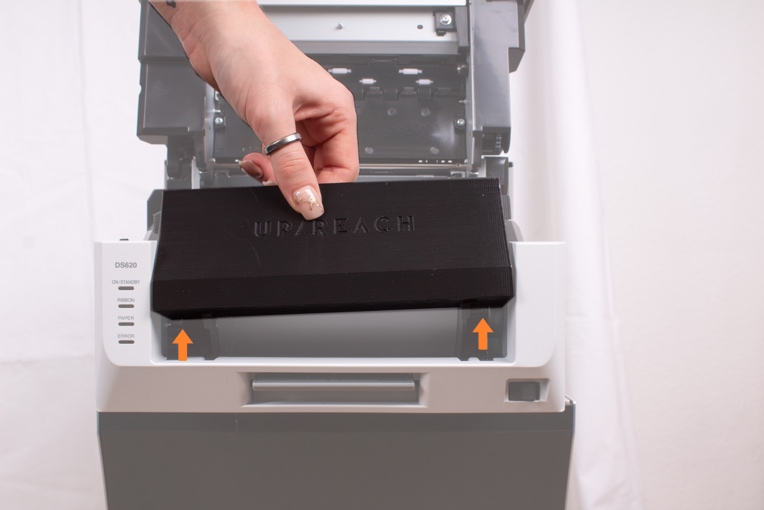 |
| 7 | If a paper roll is already inserted, remove it by moving it to the front. | 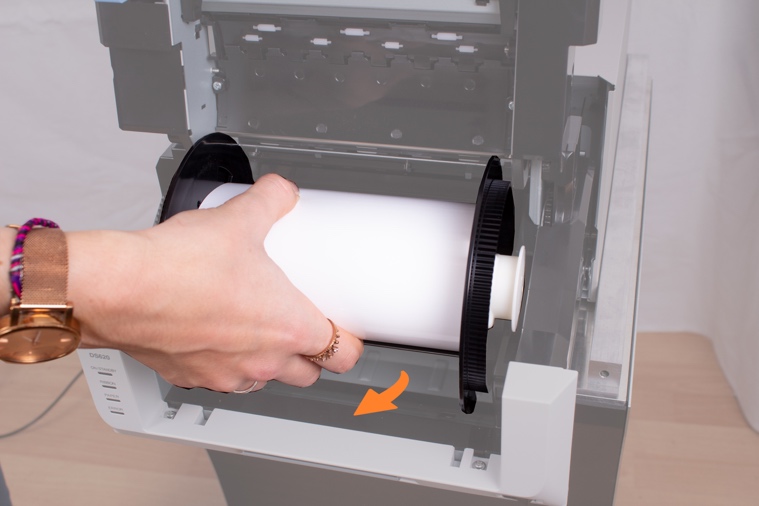 |
| 8 | Remove the paper fixture and insert it on to the new paper roll | 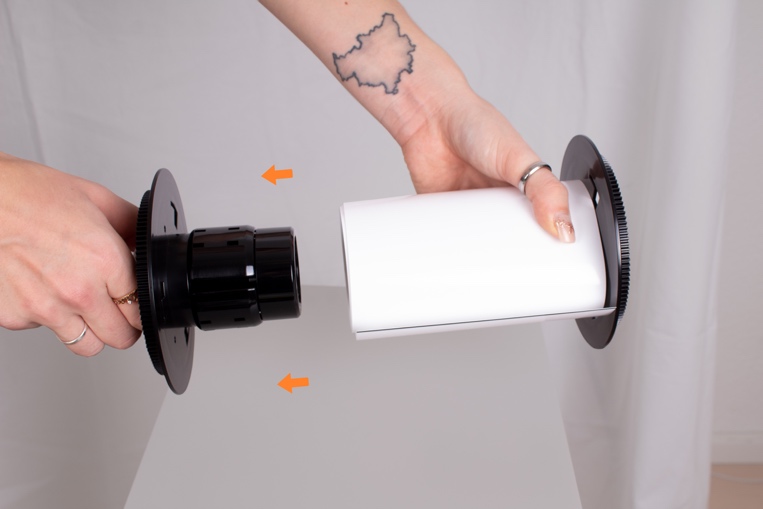 |
| 9 | Insert the paper as seen on the picture and then guide the paper down and then to the back until the printer beeps 2x. | 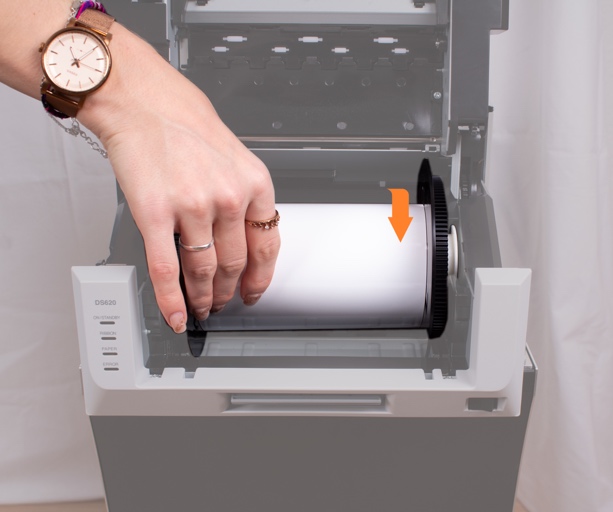 |
| 10 | Remove the ribbon & cassette from the printer | 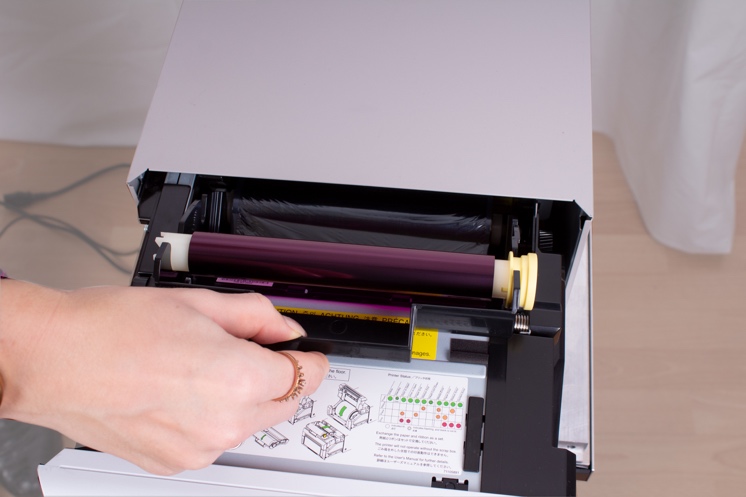 |
| 11 | Remove the ribbon from the cassette and insert the new ribbon roll. Make sure to position it correctly, use the illustration on the printer as a reference. | 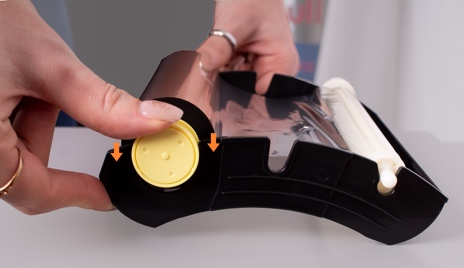 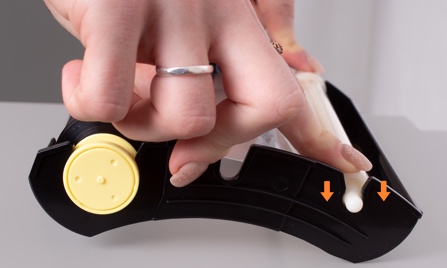 |
| 12 | Tighten the ribbon and slide the ribbon cassette inwards , insert the paper guide and close the printer. | 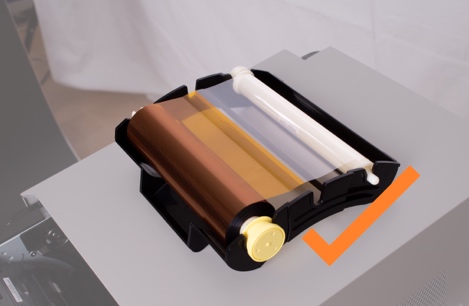  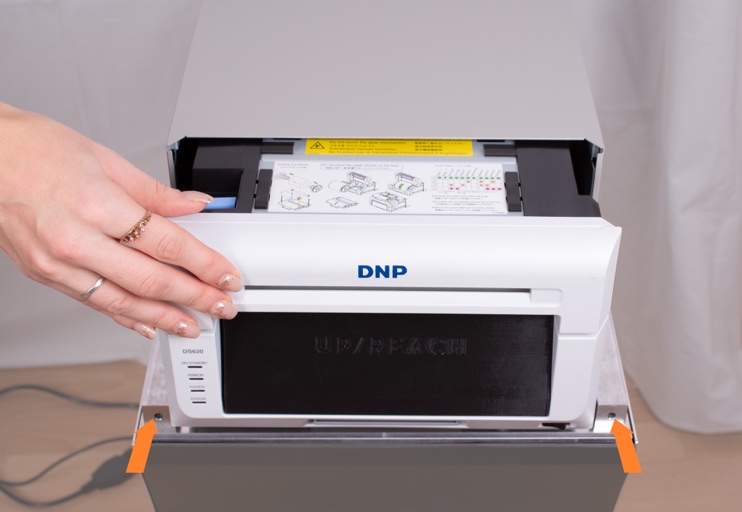 |
| 13 | The printer now runs a self-test which results in five blank printouts. | |
| 14 | Fit the housing, insert the pins and attach the branding panels. | 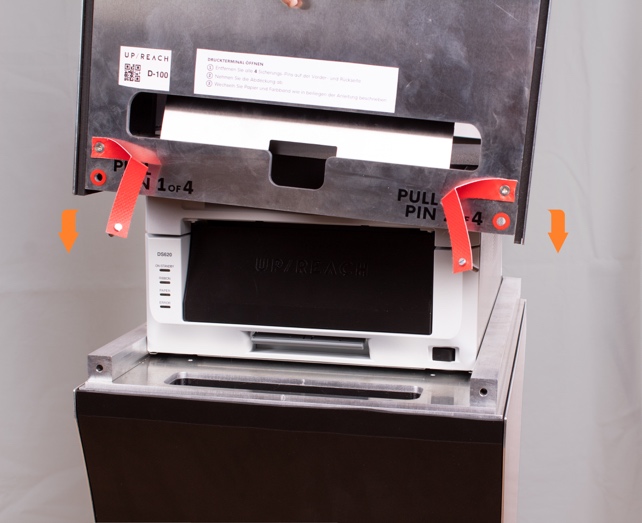 |
| 15 | The printer is now ready. |  |