Create a new Configuration
Instructions
Creating a new Configuration is pretty easy and doesn’t require many steps:
| 1 | Click on the section Configurations in the top menu bar and log in if required. | |
| 2 | Click on the + icon in the upper right corner of the Configurations table. You can also Clone/copy an existing Configuration instead. | |
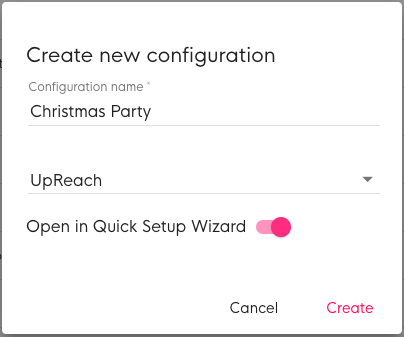
| 3 | Enter a distinctive name to identify your new Configuration and confirm. This could refer to the desired user flow, design or also the project for which it is going to be used. If you are user of multiple Clients in the UpReach Cloud, you must also select for which Client the Configuration will be used. If you do not want to use the Quick Setup Wizard (QSW) (which allows you to personalize your UpReach experience in a simple & visual way) but rather continue directly to the Advanced Settings, disable the toggle “Open in Quick Setup Wizard”. | |
| 4 | When using the QSW you can always open the advanced settings later: simply skip to the last step of the QSW and click on “Save & go to advanced settings” below the “Save” button. | |
| 5 | Set up your Configuration options as desired and click on “Save” when you’re done with the last step. | |
| 6 | Now you can continue to Add a Configuration to a Deployment in the Deployments section. |
You can save your Configuration as a draft at any time to continue later. Even unfinished drafts can already be assigned to a deployment.


